Having hardware to test configuration changes, new deployments, or troubleshooting an issue is very useful, and it is often the best way to replicate how an idea will work in a real environment. That being said with the introduction of virtual platforms we now have an acceptable alternative to real hardware in many cases. There are sometimes instances where having access to a dedicated virtual lab is not possible nor practical. Being able to run virtual platforms on your local system is very useful for such cases.
While MacOS has the ability to run KVM-based appliances, sometimes it is just easier to use VMWare Fusion. With a little preparation anyone can run the Juniper’s Virtual MX (vMX) platform on VMWare Fusion. So without further ado, this guide will help you run the vMX on VMWare Fusion.
Getting Started
The first step is to download the vMX trial from Juniper’s site. It is pretty easy to access – all you will need to do is sign up for the vMX Trial and download the software. While we are waiting for the download to complete, let’s start preparing VMWare Fusion.
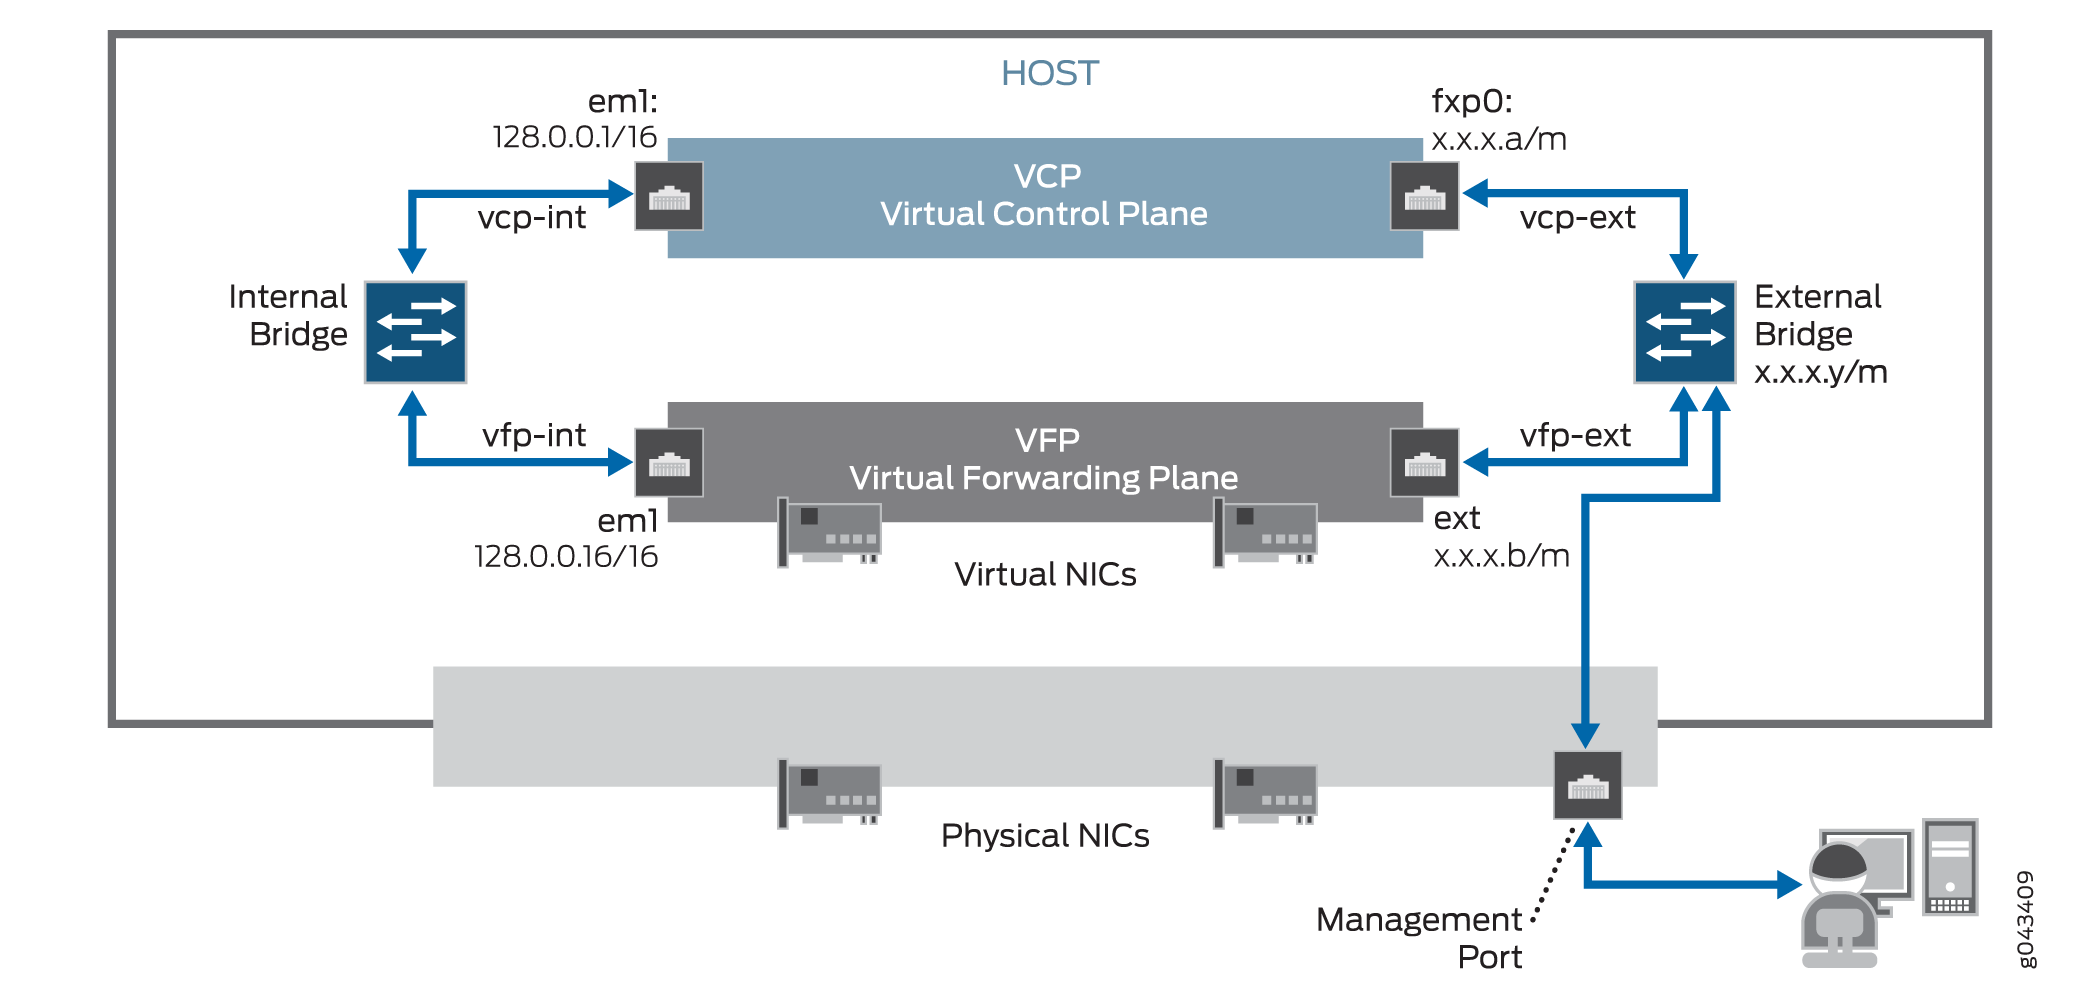
The vMX install contains two Virtual Machines (VMs) – the Virtual Control Plane (VCP) and the Virtual Forwarding Plane (VFP). The both the VCP and VFP uses one connection for communication status as well as to allow the VCP push configuration changes to the VFP. In addition each VM also has a separate interface for Out-Of Band (OOB) management. Additional interfaces will need to be added to the VFP to actually forward traffic.
The first step is to create virtual networks for the VCP-VFP communications, and any forwarding interfaces. In order to do this, open up VMWare Fusion and navigate to VMWare Fusion > Preferences (alternatively, use the ⌘, keyboard shortcut) and navigate to the Network section. Unlock the configuration and select the + icon to add a new network:
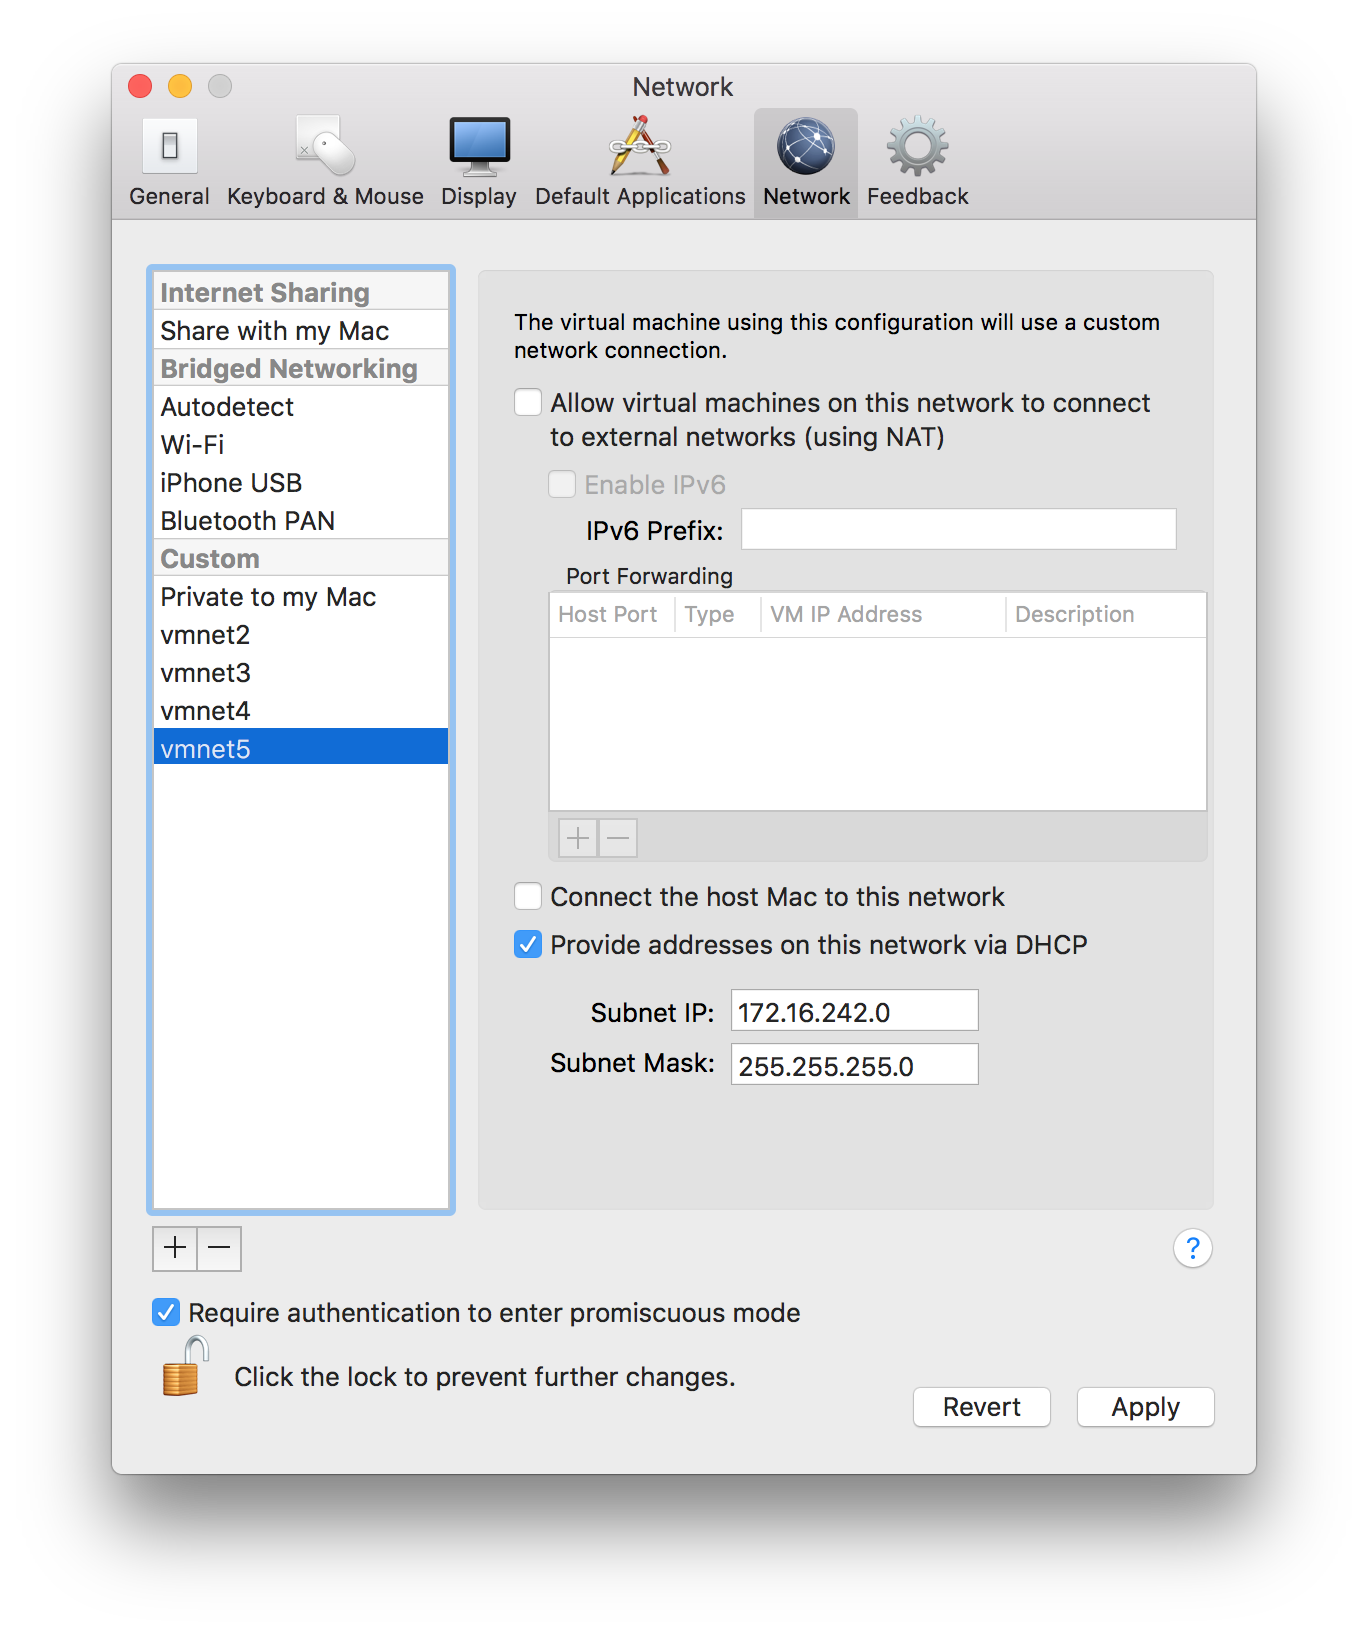
The default settings will work, as the VMs will statically set IP Address for VCP/VFP connectivity. In addition the DHCP settings will be useful for testing the forwarding interfaces. In the example above, we will set the OOB interface to the Private to my Mac network, vmnet2 for the VCP/VFP communication, vmnet3 through vmnet5 will be used for forwarding traffic. If you run more than one instance of vMX you will need a unique vmnet network for the VCP/VFP connections.
Setting up the VCP VM
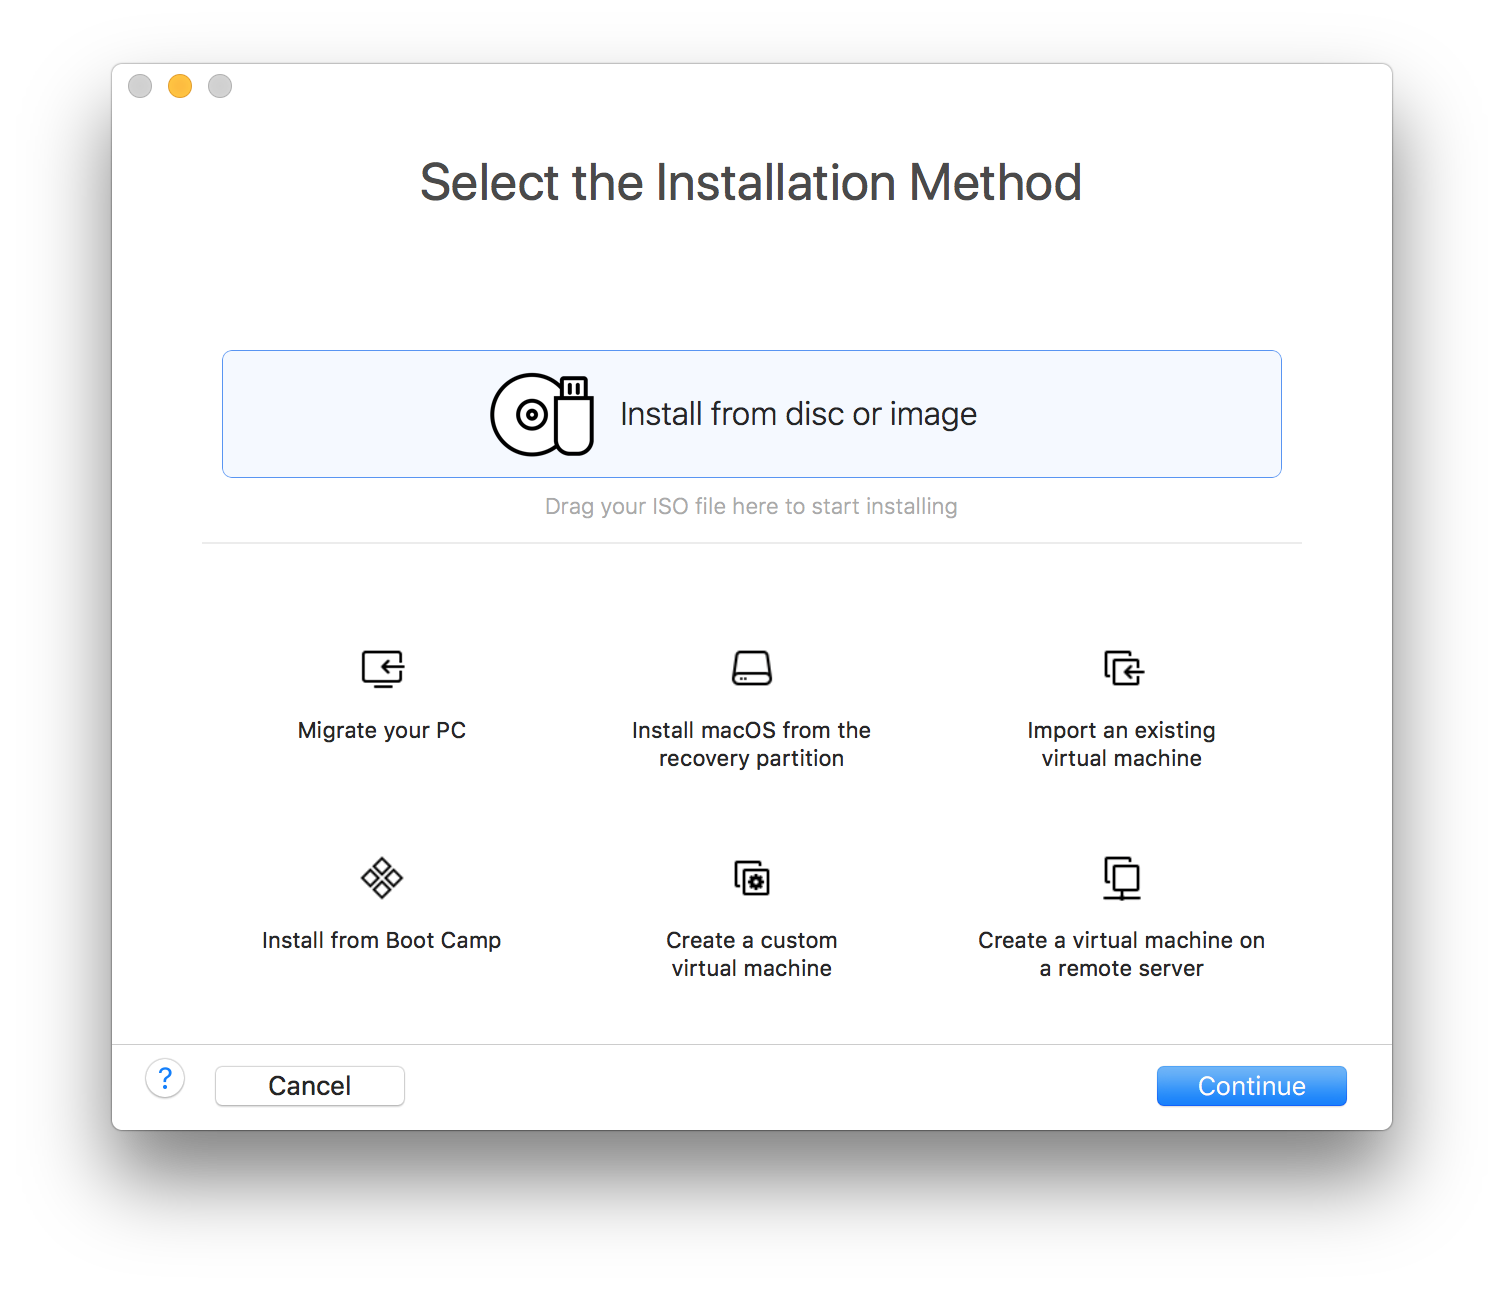
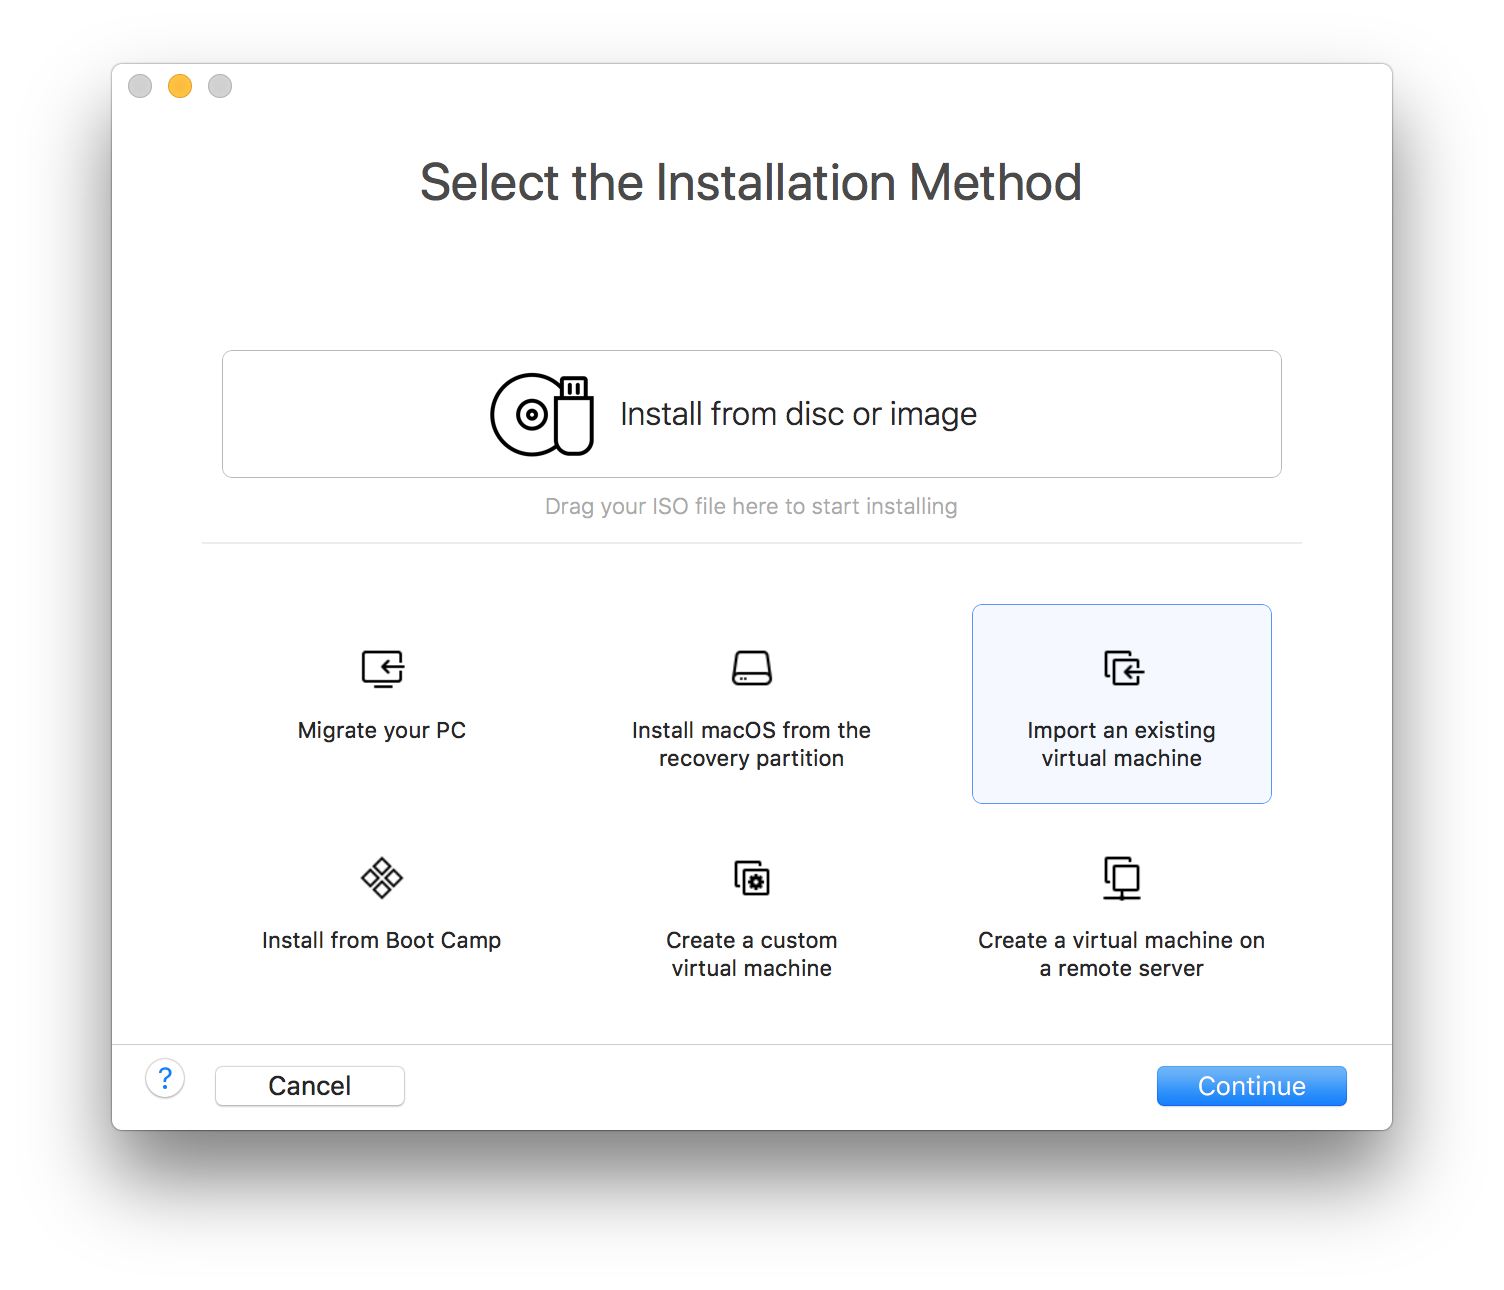
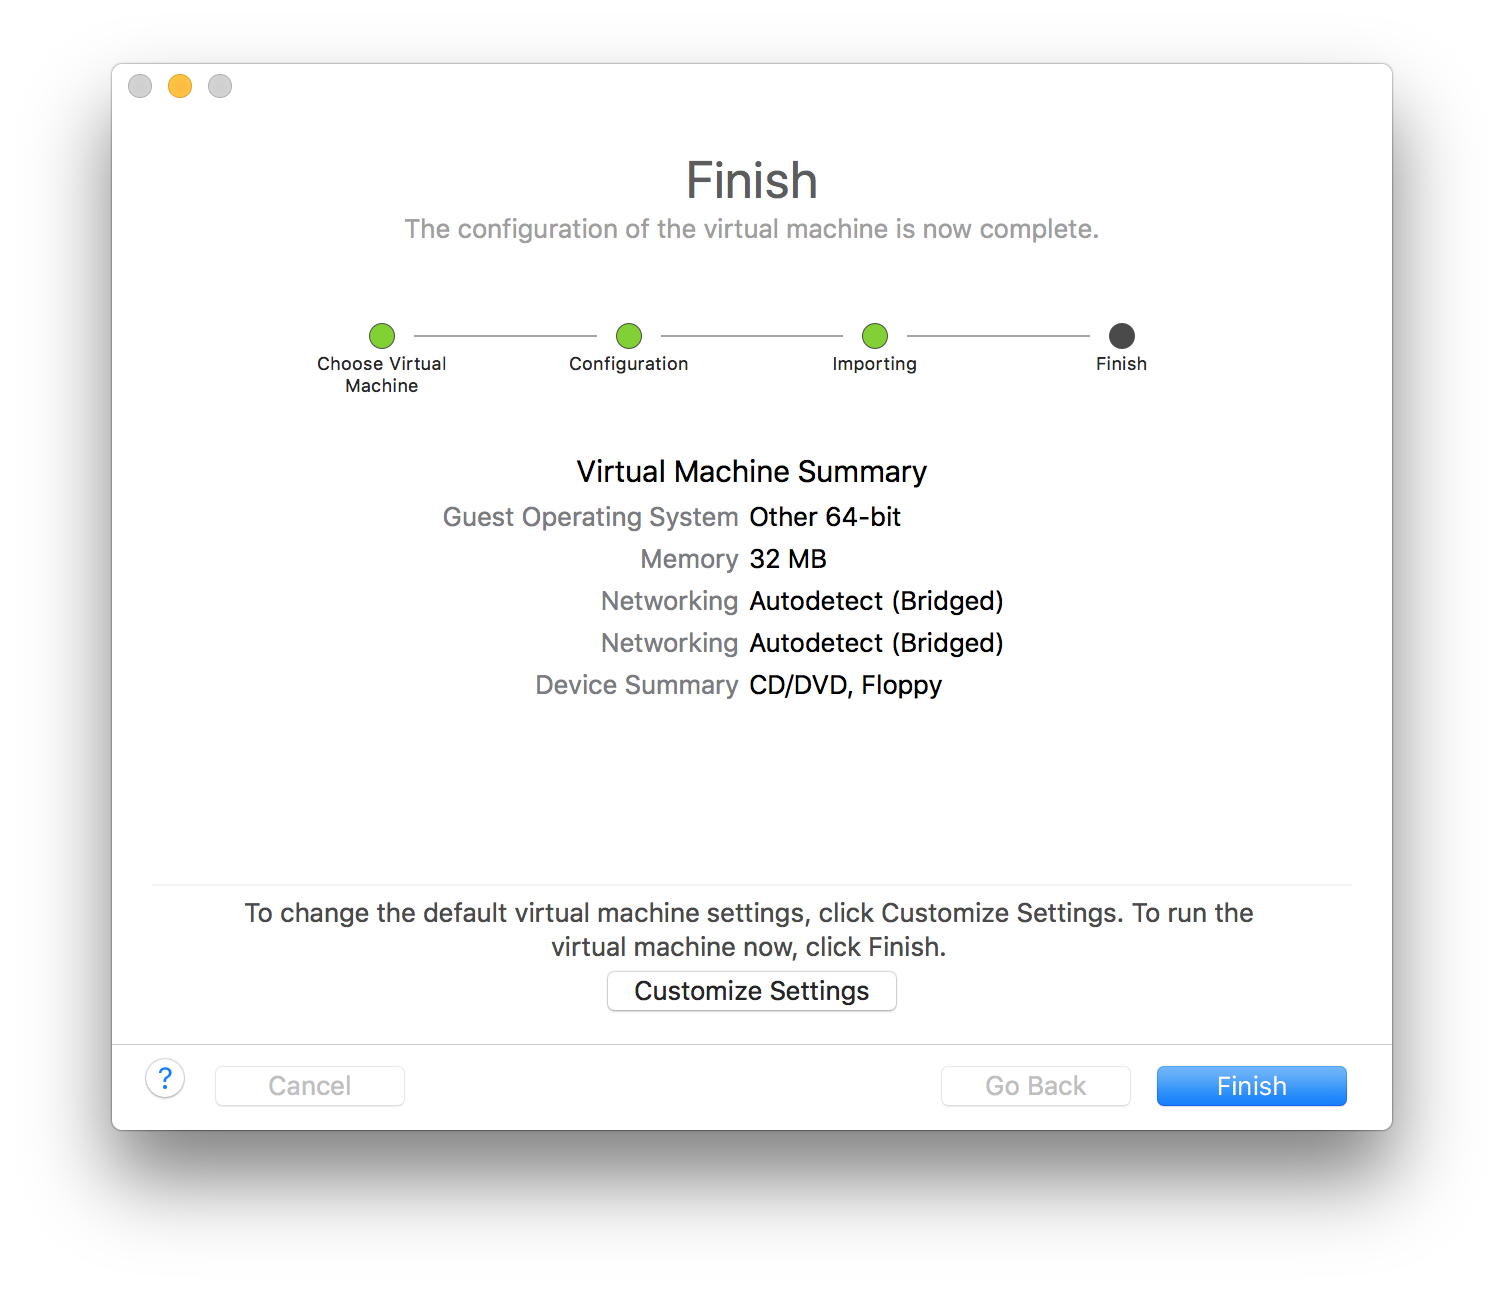
From there, let’s import the virtual machines, and make necessary changes for the VCP and VFP to boot properly. Navigate to File > New to begin the import:
Drag and drop both VMs to this window:
Select the VCP image and follow the prompts to create the VM, and the select the Customize Settings button to remap the network interfaces:

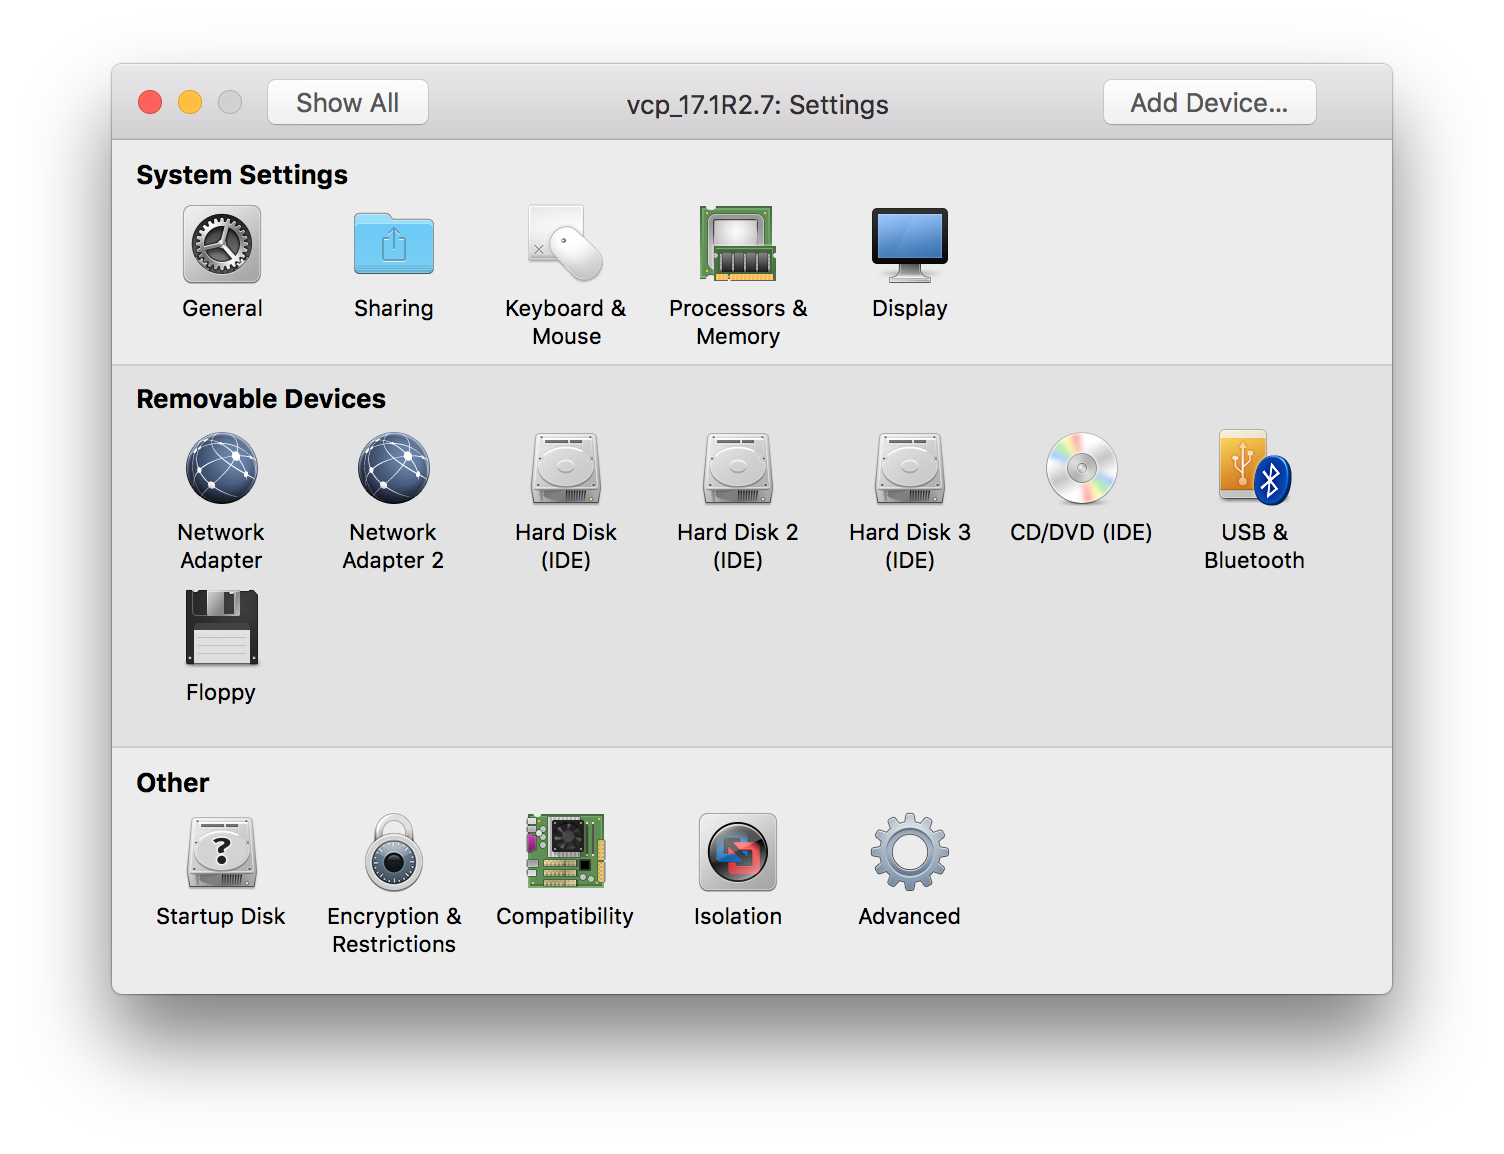
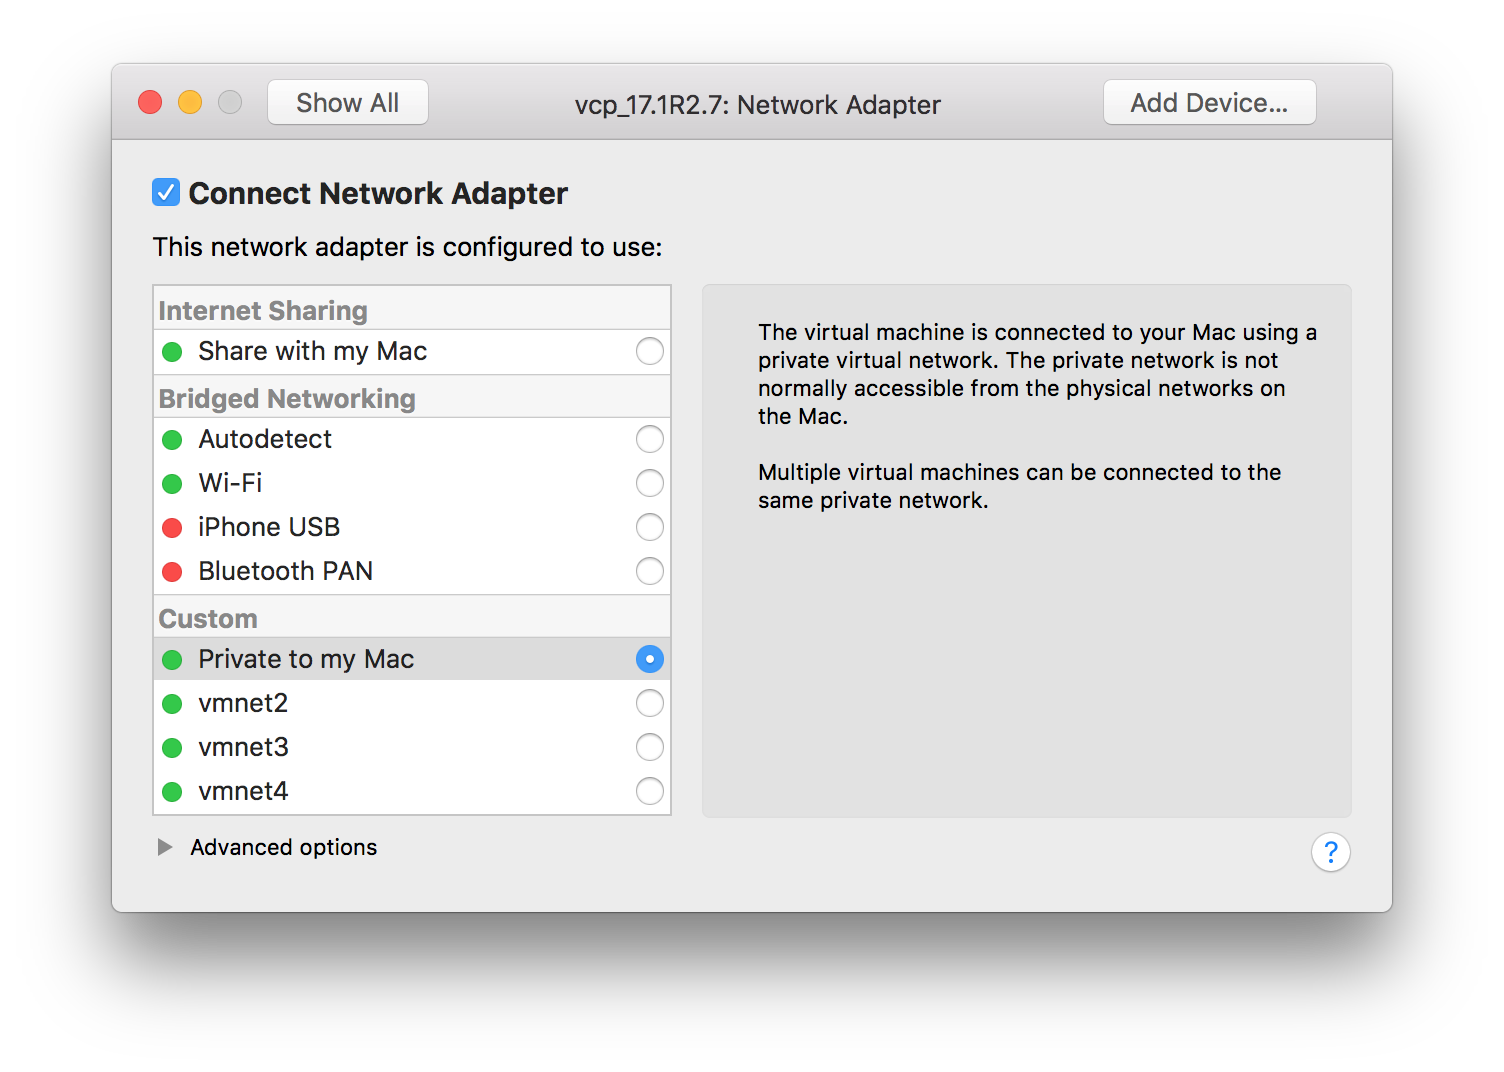
The first Network Adapter is the OOB interface. Select it to modify it, and ensure the adapter is connected and set the network to Private to my Mac:
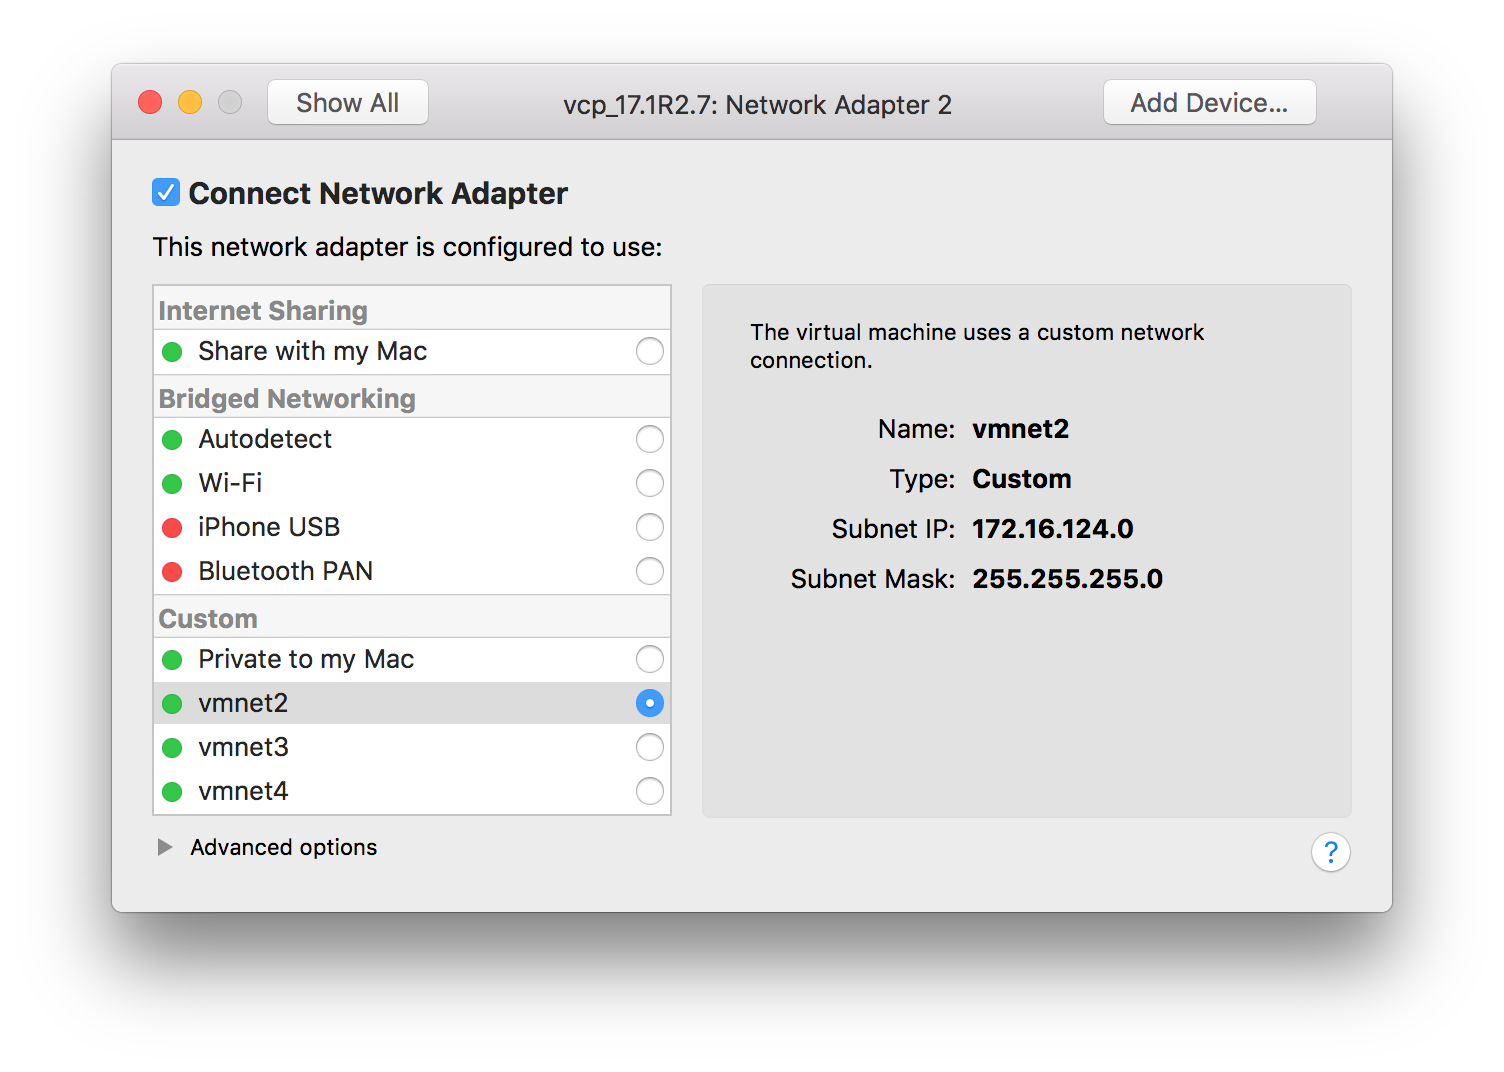
Select the Show All button and then select Network Adapter 2. From here ensure the adapter is connected and set the network to vmnet2:
After this is completed, go ahead and start up the VM. We will come back to it later.
Setting up the VFP VM
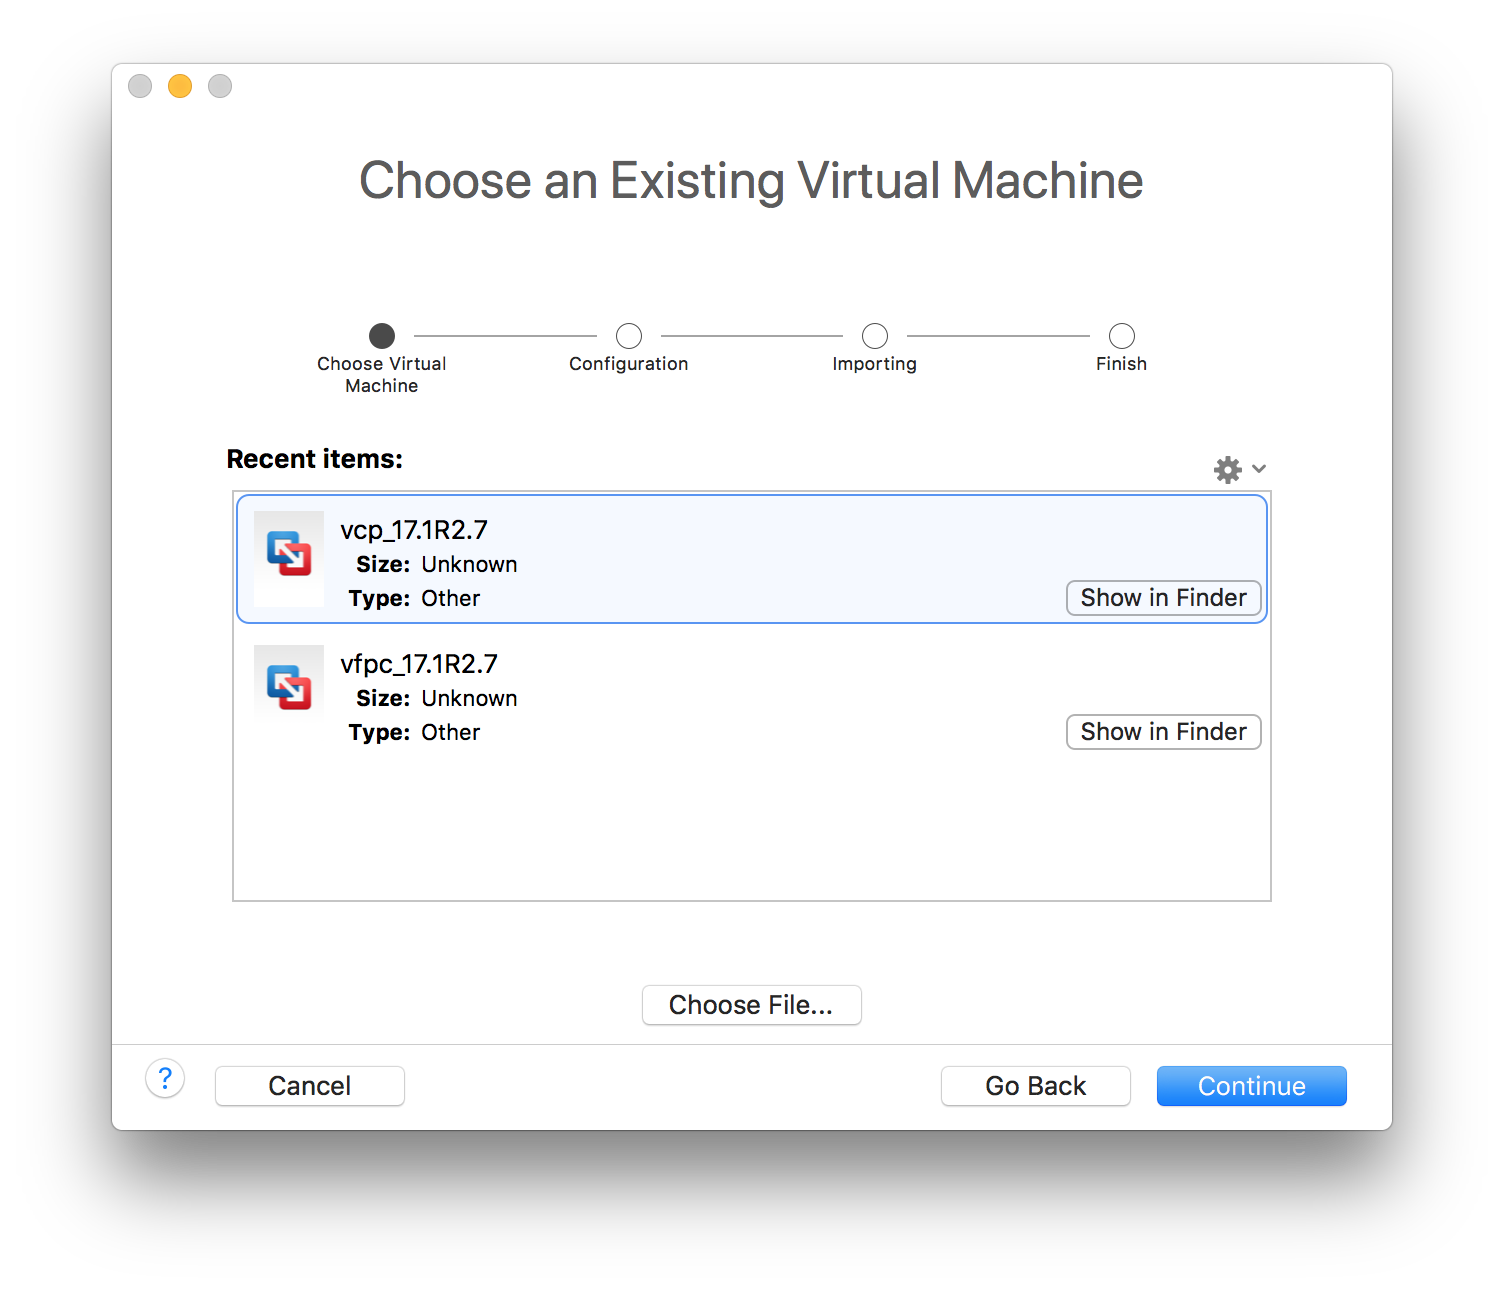
Since we have already imported the VMs in previous steps, navigate to File > New to begin the import. Select the Import an existing virtual machine to access the previously imported VMs:
Select the VFP image and follow the prompts to create the VM, and the select the Customize Settings button:
Note the Memory is setting is way too low to actually boot the VM. We will need to customize this. Select the Processor & Memory option. The minimum requirements to run a basic vMX is to 3 processor cores and 8GB RAM as shown below:

From there, select the Show All button and select the first Network Adapter. Again, the first adapter is the OOB interface. Ensure the adapter is connected and set the network to Private to my Mac:
Select the Show All button and then select Network Adapter 2. From here ensure the adapter is connected and set the network to vmnet2:
Now let’s add some forwarding interfaces. Select the Add Device… button to create the new adapter. Select the Network Adapter option to create the new interface:

From here ensure the adapter is connected and set the network to vmnet3:

Repeat the previous two steps to create Network Adapter 4 and Network Adapter 5, connecting them vmnet4 and vmnet5, respectively. Power on the VFP VM.
Initial Configuration
Head back to the VCP VM – by now, we should see a login prompt to the VM:

Login like you would any other Junos device (root and no password), and type cli to access the CLI:
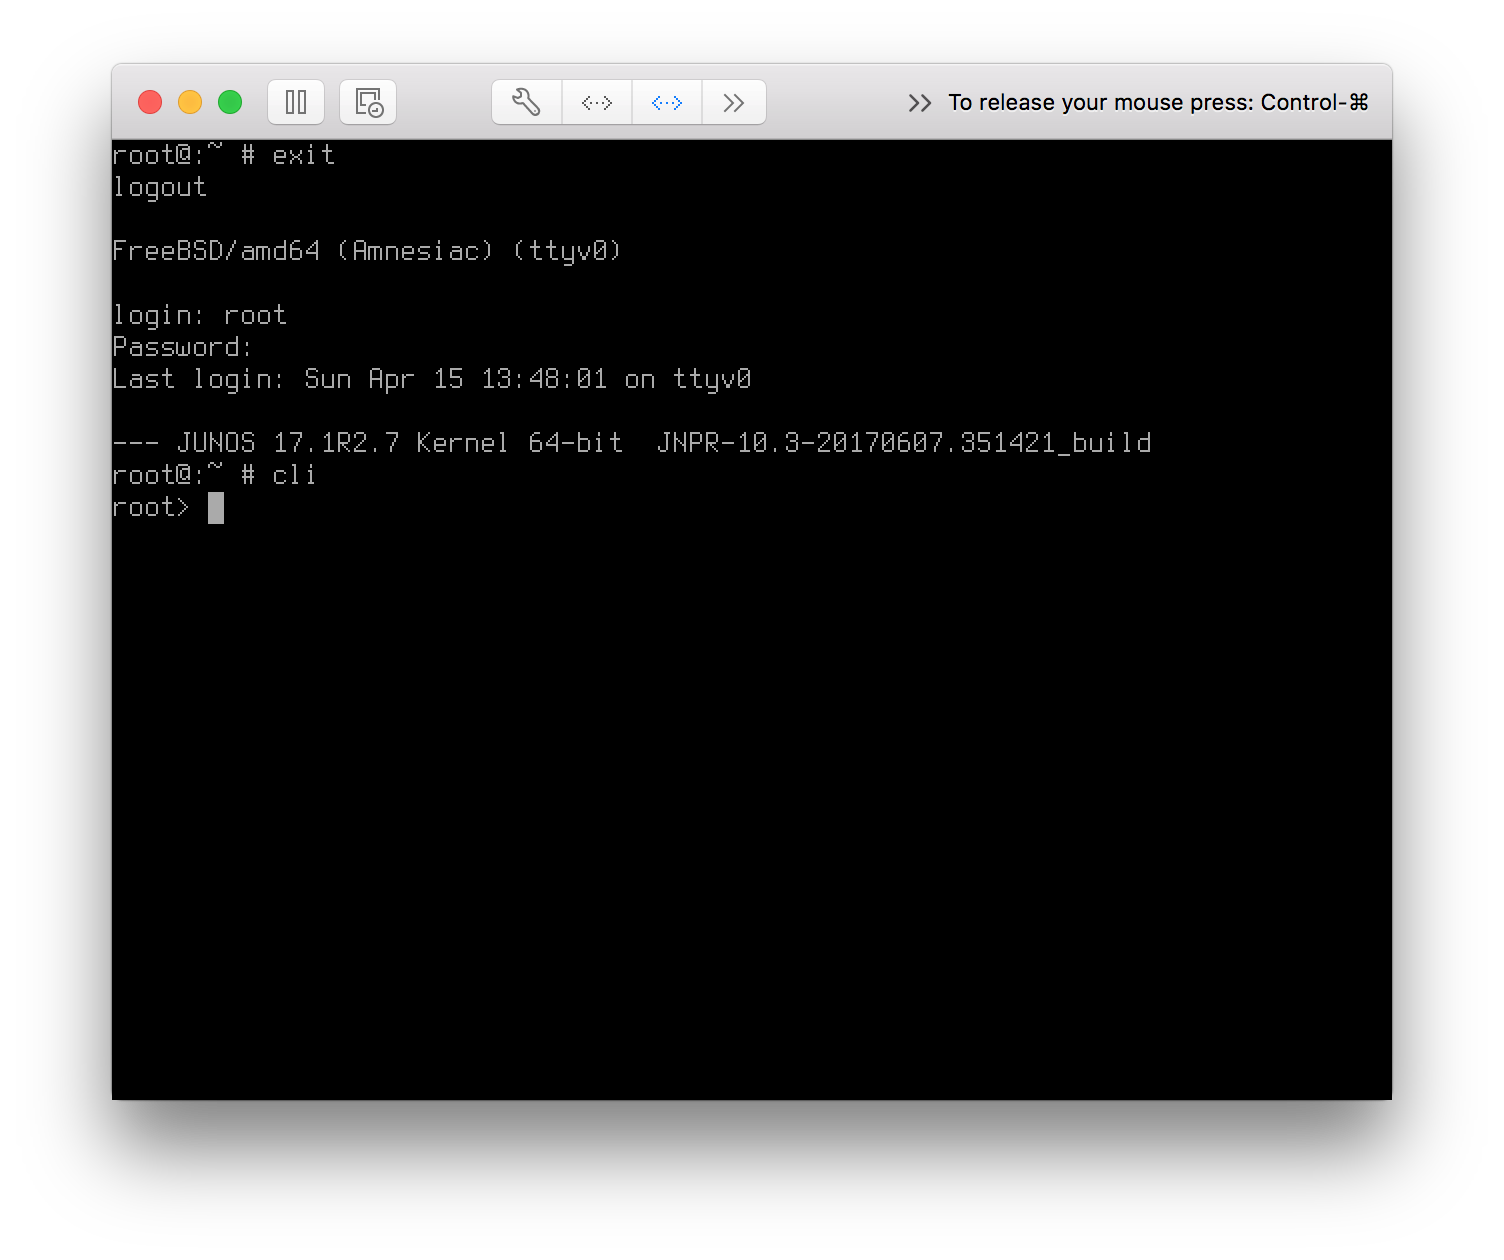
From here, we need to add some configuration lines in order to enable management, and to set the VM parameters.
set interfaces fxp0 unit 0 family inet dhcp

set system services ssh

set chassis fpc0 lite-mode

set system root-authentication plain-text password
- The first command enables DHCP on the OOB interface which will inherit a DHCP address from the Private to my Mac network
- The second command enables logging into the vMX via SSH
- The third command sets the forwarding plane to lite-mode, conserving memory and cpu resources
- The final command sets a password on the root account
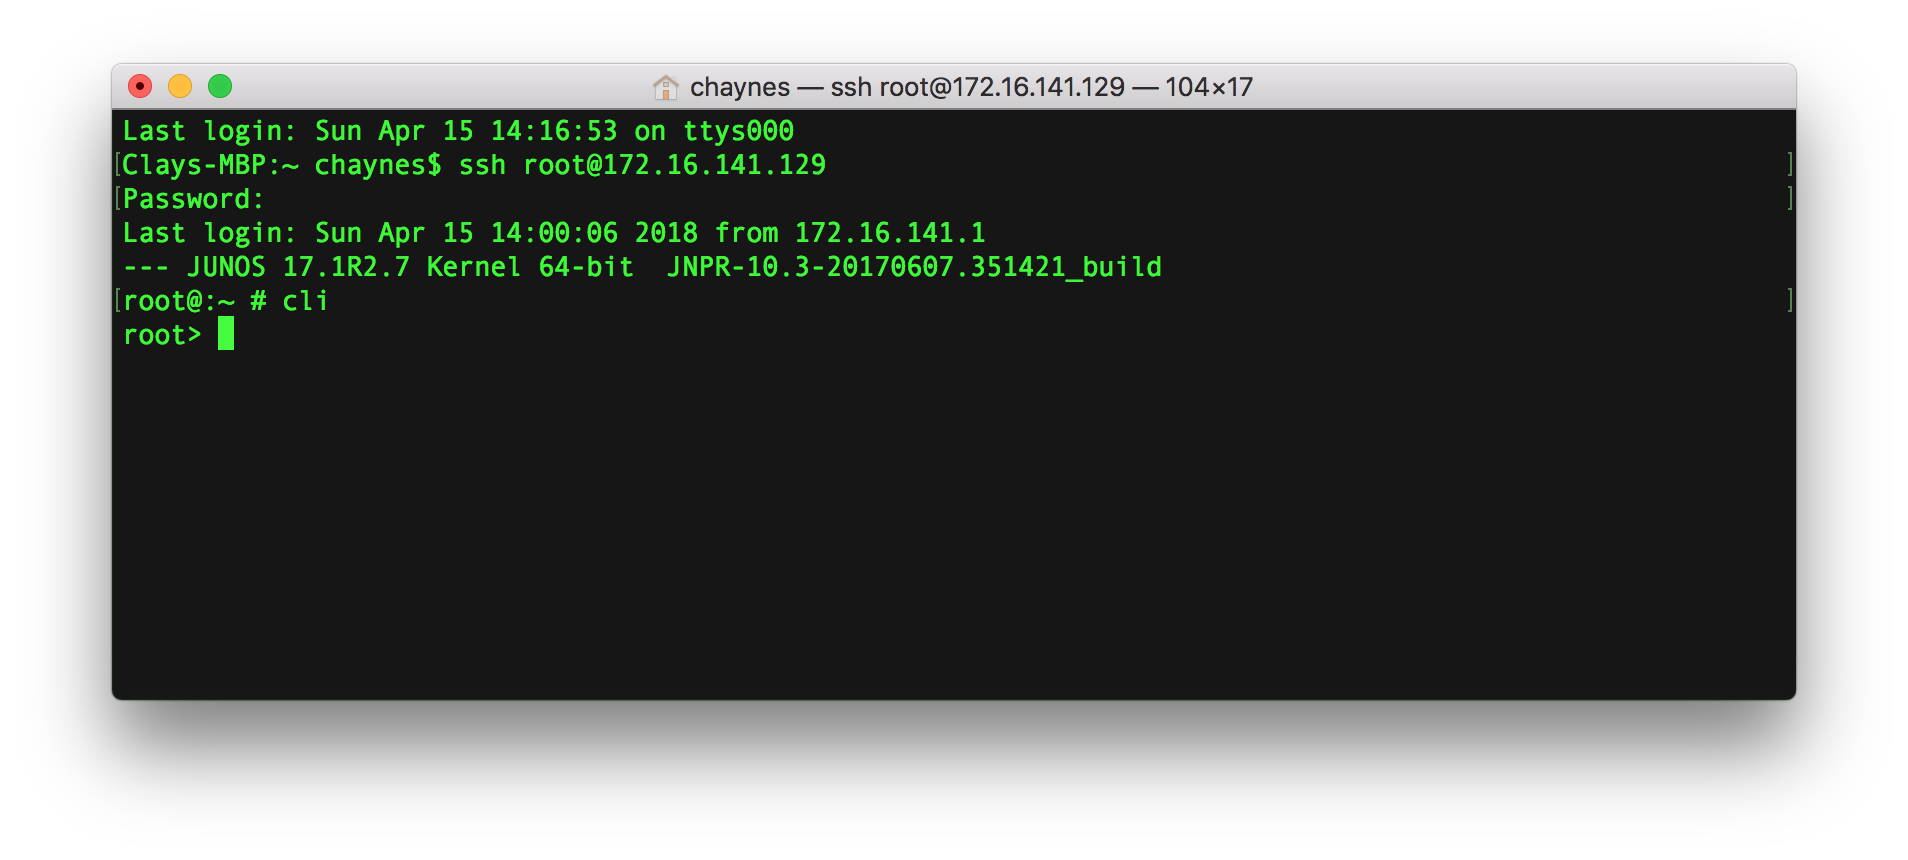
Commit the changes and head back to the operational mode. From here run the command show interfaces terse fxp0 to see the address that is assigned to your fxp0 interface:
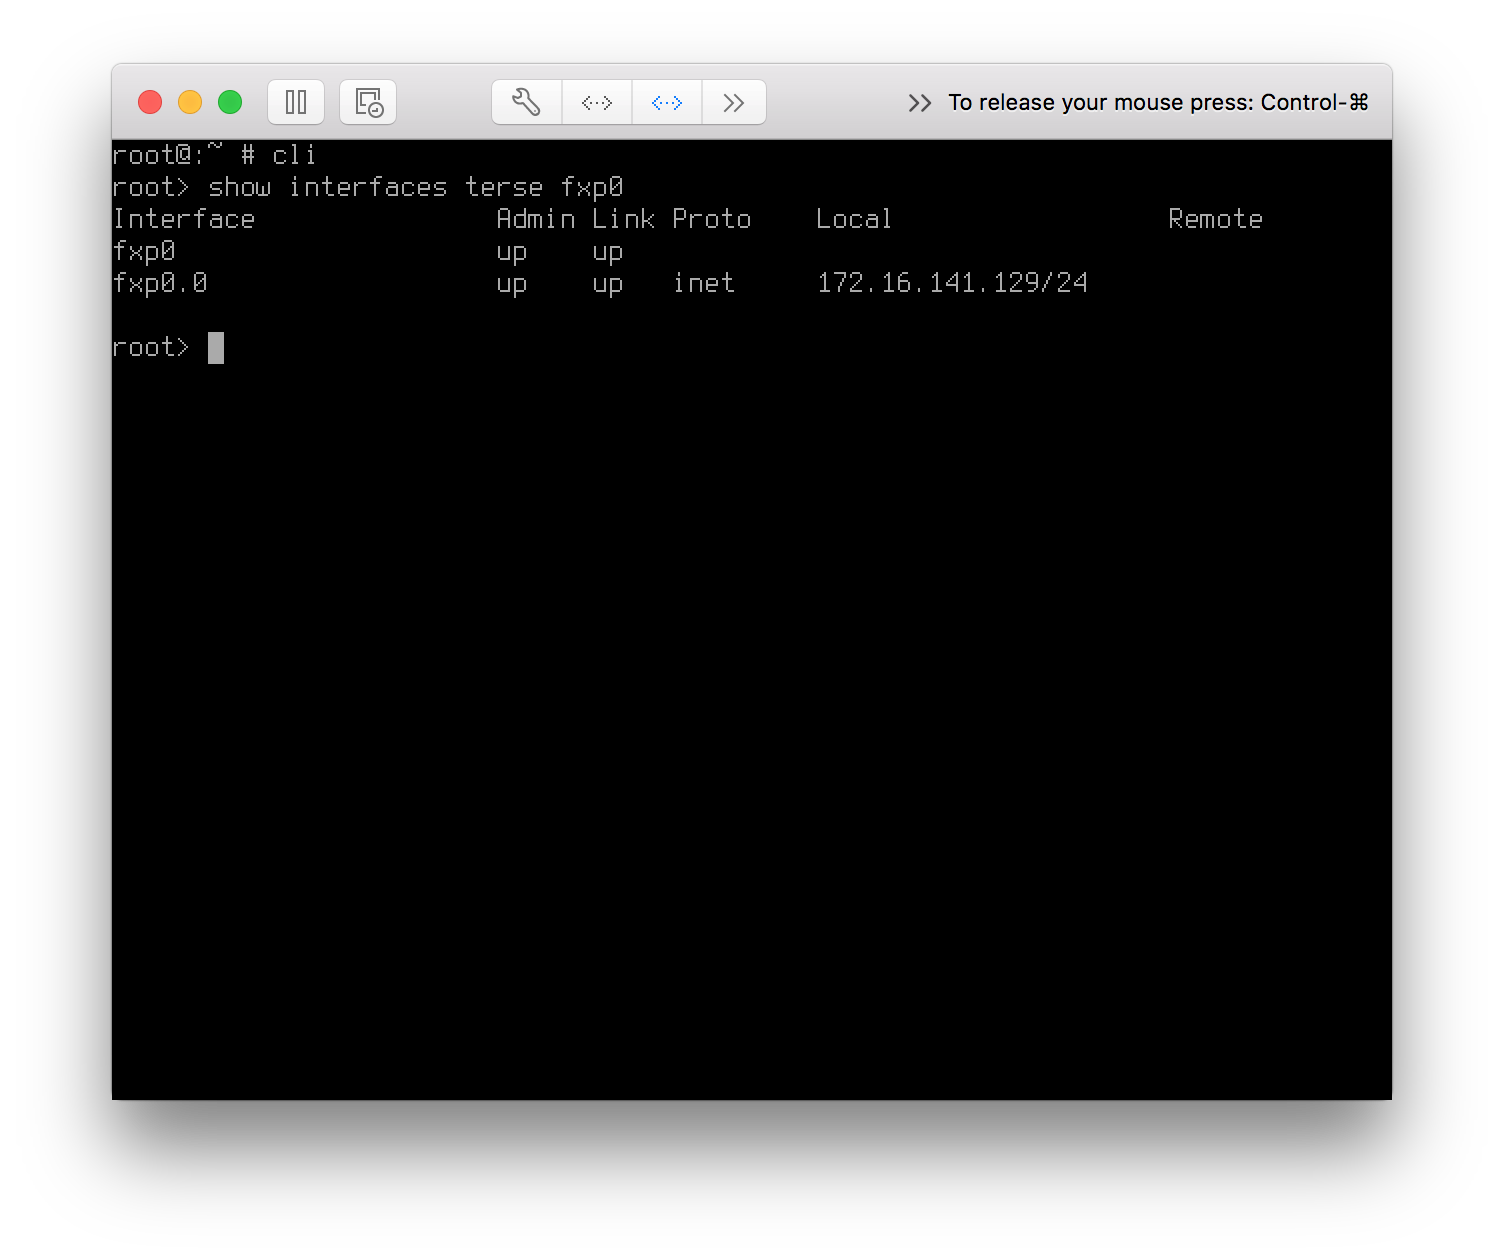
You can now SSH into this interface.
By now, you may see some prompts about enabling promiscuous mode on some interfaces as shown below:

This is a prompt from the VFP network interfaces, and is required to forward traffic on the Virtual Network Adapters. Enter in your Mac’s username and password, and repeat this for the other two interfaces as well. (You can disable these prompts by navigating to VMWare Fusion > Preferences > Network and unchecking the checkbox labeled Require Authentication to enter promiscuous mode)
Let’s enable DHCP on the forwarding interfaces with the following commands:
edit

set interfaces ge-0/0/0 unit 0 family inet dhcp
set interfaces ge-0/0/1 unit 0 family inet dhcp
set interfaces ge-0/0/2 unit 0 family inet dhcp

commit and-quit
Verification
Let’s see if both the VCP and VFP are able to see each other. Run the following two commands to verify communication as well as see the ge interfaces:
show chassis hardware

show interfaces ge* terse
You should see the following:
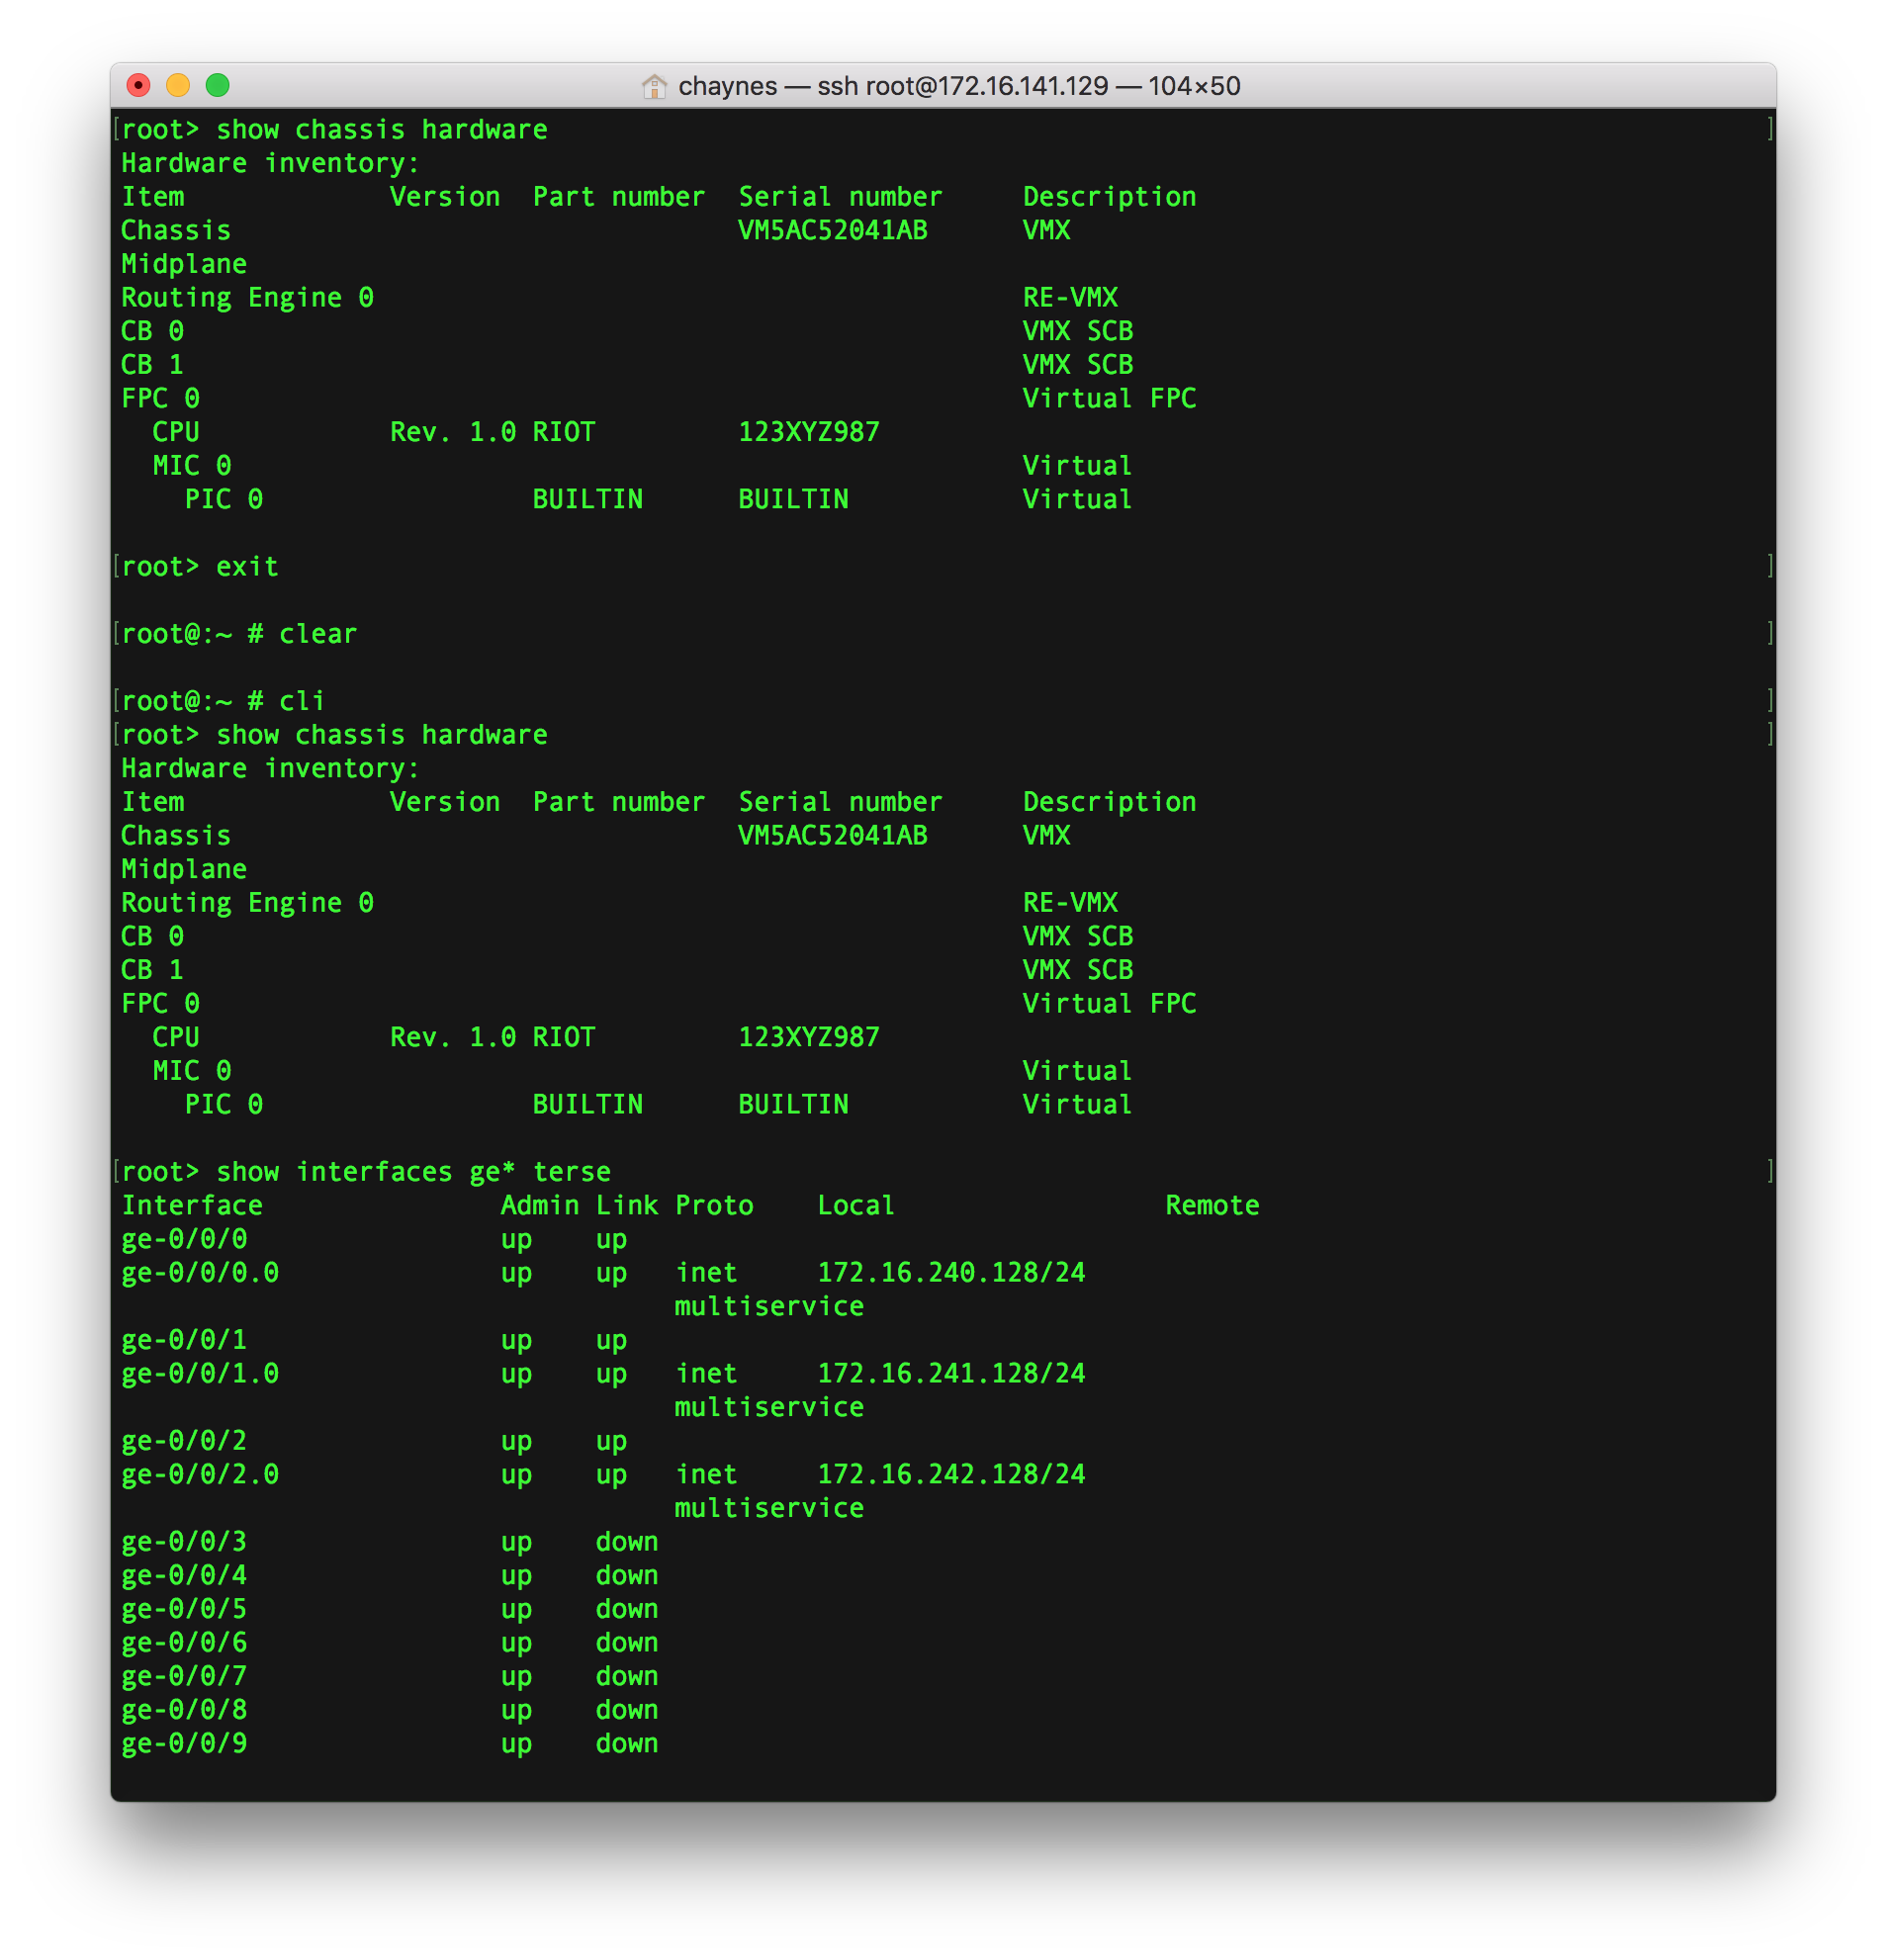
The show chassis hardware command should show fpc0 and the Virtual FPC entries, and you will also see the the three ge interfaces that we originally created. Since we enabled DHCP in a previous step, ge-0/0/0 through ge-0/0/2 should have an IP Address.
If you need to add more interfaces then add those to the forwarding plane, and restart the VFP VM to see them become active.
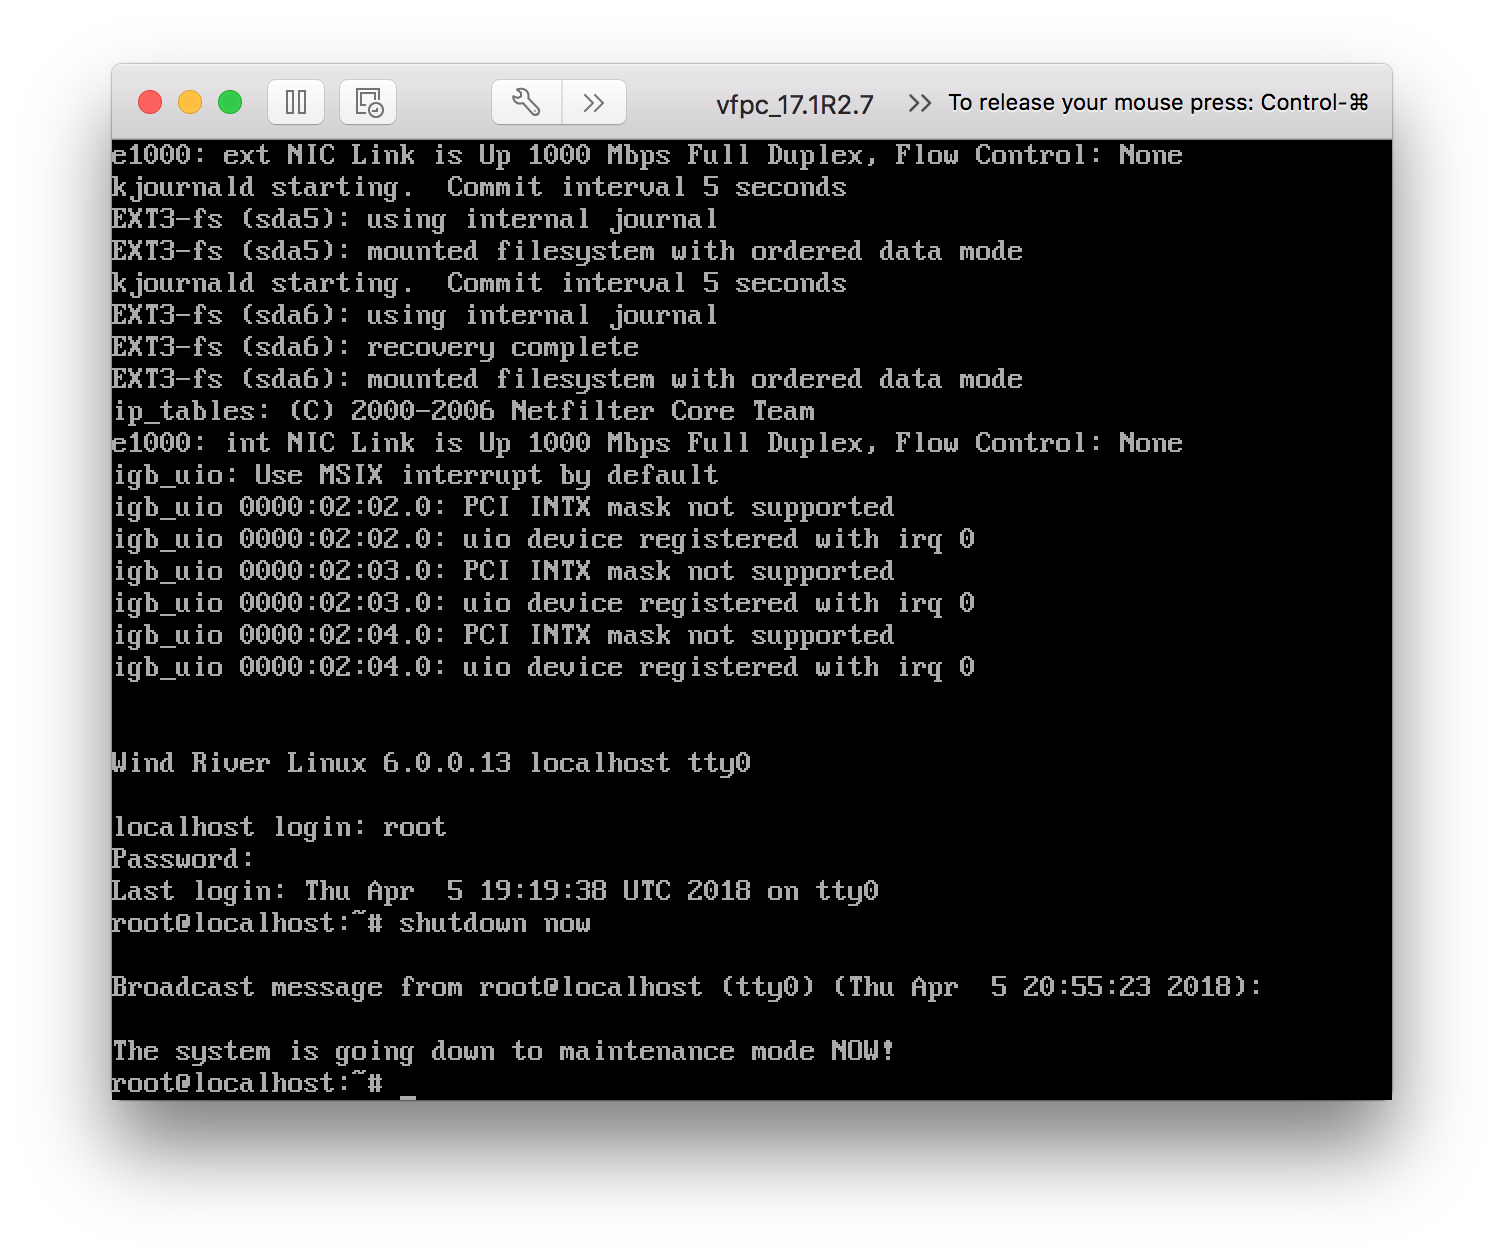
If you need to access the VFP for any reason, you can open the VFP VM window and login with the default credentials of root for both the username and password:
Conclusion
Now that we have this VM setup, you can now start testing new configurations or troubleshoot an issue. Enjoy!

Thanks! This is probably the best step by step documentation i have seen in a long time (amazing screenshots too). The only addition i made on mine was to disable “auto-image-upgrade”; With 17.2, the console gets spammed with these log messages preventing me from entering any commands.
Out of curiosity, to spin up a 2nd router, would you just run the same procedures again? or just clone and then update the mac addresses and IP’s?
I always created brand-new. Whenever I cloned the services never worked quite right for me. I’m glad you enjoyed the post, hopefully I have some new content on here soon enough!
How should we configured *lt interface in this vMX
Great post! To interconnect two vMX routers, do we simply replicate the above process? Thanks.
More or less. Create a unique vmnet for the vcp-vfp link (shown as Network Adapter 2 on the VM images), and then connect any dataplane interfaces in the other virtual networks as you’d like!
Hy,
I am working and learning all: https://packetpushers.net/junos-logical-system-great-way-to-learn-junos-and-prepare-for-certification/
But I am in the point of Using Physical interfaces to connect logical router/systems:
I have installed and use vMX into VMware Fusion into MacBook Pro.
I have searched and I do not find how to connect back-to-back physical interfaces ge.
Please, can you help me?
Silvia